Wednesday, 22 June 2016

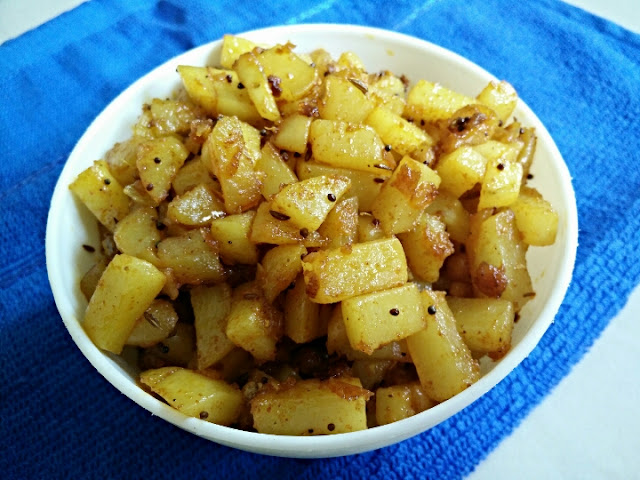
Sabudana Kichidi | Saggubiyyam Upma

sabudana khichdi is usually made during fasting days like navratri or mahashivratri or ekadashi. sabudana khichdi is an easy snack, breakfast recipe.


Ingredients

sabudana - 1 cup
potatoes - 1 or 2
Roasted peanuts powder - 1/2 cup
peanuts - 2 tbsp
curry leaves - 1 string
ginger/adrak - 1 tsp grated (optional)
green chili - 1 chopped
cumin seeds - 1 tsp
grated fresh coconut - 1/4 cup(optional)
sugar as per taste(optional)
lemon juice - 1/2 tsp or as required (optional)
oil - 2 tbsp
salt to taste
turmeric - 1/4 tsp
hing 1/4 tsp

Instructions 


  1. Wash and soak sabudana overnight or for 4-6 hours. 
  2. Next day drain the sabudana very well and keep aside in a bowl. 
  3. Boil the potatoes and when warm peel and chop them. 
  4. Now heat oil, add cumin seeds and fry till they crackle and get browned. 
  5. Now add the curry leaves, peanuts and green chilies, fry for half a minute and then add the grated ginger. 
  6. Stir till the raw smell of the ginger goes away. now add potato, turmeric, hing and saute for 1-2 minutes. 
  7. Add the sabudana, peanut powder, salt, sugar and mix well keep on stirring the mixture. 
  8. When the sabudana looses their opaqueness and starts becoming translucent they are cooked.
  9. it takes hardly 6 - 7 min to get transparent. Don't over cook as they might become lumpy and hard. 
  10. Lastly add grated coconut. mix well, adjust the taste. switch off the flame 
  11. While serving sabudana khichdi, drizzle with some lemon juice and serve hot.

Tuesday, 21 June 2016

Idli

Soft Fluffy Idlis


Ingredients
Urad dal - 1 cup,
idly rava - 2 cups,
fenugreek seeds - 1tbsp,
salt - to taste.

Instructions

  1. Wash the urad dal in two changes of water and soak the dal and fenugreek seeds in water for at least 4 hrs. 
  2. In a separate bowl, soak idli rava in water for atleast half an hour.
  3. Drain water from the soaked urad dal and place half of the soaked dal in the mixer grinder and add few tbsps of urad dal soaked water. Grind the urad dal.
  4. During the grinding process, keep adding a few tbsps of the water and continue grinding. 
  5. Add the cooked rice while grinding.(optional)
  6. Grind till it is soft and fluffy. Feel the batter between your fingers and it should be super soft on touch. If it is coarse, continue to grind it till you achieve a smooth batter that is not too thick nor too thin. 
  7. Remove the ground batter to a large stainless steel vessel as the batter will increase by 50% of the original volume on fermentation.
  8. Squeeze water from the soaked rice rava and add it to the ground urad dal batter and use your hand to mix. The urad dal batter and idli rava should mix well. Once mixed, place lid.
  9. Place the mixture in a warm place for 8-10 hours or overnight to let the idli batter ferment. The fermentation is slow in winter and quick during summer. The key to soft and fluffy idlis is in the fermentation process.
  10. After 8 hours you will find that the mixture will rise to 50% of the original volume. Add salt and mix gently with a ladle. Do not over beat. The batter is now ready to make idlis.
  11. Pour 1 1/2 to 2 cups of water to the idli maker or pressure cooker and place the idli stand in it. Turn on flame and heat the water to almost boiling point. While the water is heating, wash the idli plates and lightly grease them with oil.
  12. Spoon the idli batter using a small ladle. Do not add too much batter as it will increase in volume on steaming. Place the idli stand in the idli steamer and place lid. Do not use the cooker weight if you are using a pressure cooker. Steam on medium high for 12-15 mts and turn off flame. Do not open lid for 8-10 mts after turning off the flame.
  13. Remove the lid and the idli stand from the idli maker. Wet a spatula or a knife and carefully remove each idli and place in a bowl.
  14. Place steamed idlis in a bowl and serve with sambar, chutney and podi of your choice.

Thursday, 16 June 2016

Ragi Dosa | Finger Millet Dosa

Ragi Dosa is very nutritious breakfast dish made with finger millet flour just like normal Dosas. I have already posted Ragi idli with that same batter we can also make nice crispy dosas with the same batter. Only thing reqiured is just add some water. For this Dosa I used Rice, urad dal, and Ragi millet.


Ingredients

Urad dal - 1/2 cup
Rice - 1 cup
Ragi flour - 1 cup
Salt - 1/2 tsp
Cooking soda - pinch
Sabhudana - 2 tbsp(saggubiyyam)

Instructions
  1. Wash and soak Urad dal and rice for 3, 4 hours and soak the rava for atleast 1 hour before mixing with urad dal batter.
  2. After 4 hours drain the water from the urad dal, rice ,add the soaked sabudhana and grind to a smooth paste adding 3/4 cup of water.
  3. add the ragi flour and mix well.
  4. Place the mixture in a warm place for 8-10 hours or overnight and let the batter ferment. The fermentation is slow in winter and quick during summer.
  5. After 10 hours you will find that the mixture will be double the original volume. add salt and pinch of soda and mix well. The batter is now ready to make dosas.
  6. Heat the dosa pan. Make it hot enough to sizzle away drops of water, pour 3 or 4 drops of oil and spread it on the pan.
  7. Pore some ragi batter and spread it using the spoon in a circular motion.
  8. add few drops of oil around the edge of the dosa.
  9. Wait for the batter to edges become slightly brown and lifts,
  10. Now flip the dosa and brown the other side. Yummy ragi dosa is ready for serving


Wednesday, 15 June 2016

Ragi Idli

Ragi idli is very nutritious breakfast dish made with finger millet flour just like normal idlies. ragi is a millet grain which has many health benefits. as a super food, its excellent for both kids as well as adults.


Ingredients

Urad dal - 1/2 cup
Idli rava - 1 cup
Ragi flour - 1 cup
Salt - 1/2 tsp
Cooking soda - pinch
Sabhudana - 2 tbsp(saggubiyyam)

Instructions
  1. Wash and soak Urad dal for 3, 4 hours and soak the rava for atleast 1 hour before mixing with urad dal batter.
  2. After 4 hours drain the water from the urad dal, add the soaked sabudhana and grind to a smooth paste adding 3/4 cup of water.
  3. Squeeze out the water from the rava and add to the ground urad dal batter, ragi flour and mix well.
  4. Place the mixture in a warm place for 8-10 hours or overnight and let the idli mixture ferment. The fermentation is slow in winter and quick during summer. The key to soft and fluffy idlis is in the fermentation process.
  5. After 10 hours you will find that the mixture will be double the original volume. add salt and pinch of soda and mix well. The batter is now ready to make idlis.
  6. Grease idli maker plates with some oil and fill with idli batter. Steam covered for about 10-12 minutes and remove each idli carefully with a spatula.
  7. Serve hot with sambar or chutney of your choice.

Tomato Pappu Andra style

I love this dal very much,its very flavourful and so good with hot white rice and ghee. This tomato pappu was my favorite of all the Andhra food. It goes excellent with chapathi/roti too. When its pair with potato fry or with mango avakai there nothing best.


Ingredients
Toor dal - 1 cup
Tomato - 2-3
Garlic ,crushed - 2
Turmeric - pinch
Green Chillies,long slit - 4
Onion,finelly chopped - 1/2 cup
Chilly powder - 1/2 tsp
Salt - as per taste

For Tempering:

Ghee/Oil - 2 tsp
Mustard seeds - 1/2 tsp
Urad dal - 1/2 tsp
Garlic,crushed - 4-5
Curry leaves - as per taste
Dry red chillies - 2
Hing - a pinch

Instructions

  1. In a pressure cooker add the toor dal and wash them well, now add chopped tomatoes, crushed garlic, turmeric, salt, green chillies, chopped onion, turmeric, chilli powder and finally add 2 cups of water. 
  2. Close the lid and pressure cook until 3 whistles, then switch off the flame and wait until the pressure goes. 
  3. Open the lid when pressure goes, and mash the dal with wooden masher, and keep it a side. 
  4. Take another pan and heat for tempering, add ghee/oil then add the tempering ingredients 1 by 1 and saute for few mins. 
  5. Now add the tempering to dal, and adjust the taste and serve with rice/rotis. 

Friday, 10 June 2016

Rice Kabab | Rice Fritters

Rice Fritters is an easy, delicious deep fried snack with rice. Sometimes usually some boiled rice will left in our house. Whenever it happened to me, I will make something with that like lemonrice, fried rice, or if it is summer then i keep them as vadiyalu. Today I made this wonderful snack.


Ingredients

Rice - 2 cups
Potatoes - 3
Green chilli - 3
Corriander leaves - 1 bunch
Onion - 1
Salt - to taste
Chilli powder - 1 tsp
Turmeric - pinch
Chat masala - 1 tsp
Ginger garlic paste - 1 tsp
Oil - for deep frying

Instructions
  1. Boil the Potatoes and mash them. 
  2. Take a bowl, add rice and mash it well with ur hand, now add mashed potatoes, chopped onion, chopped green chillies, chopped corriander, turmeric, salt, red chilli powder, ginger garlic paste, chat masala and mix well with little water. 
  3. Take a deep pan, and heat the oil. 
  4. While oil gets heating make the mixture into required shape and put them on a plate. 
  5. when oil gets hot, put them in oil and fry them until they turn nice golden colour. then remove from oil. 
  6. Now Serve hot with tomato ketchup or as you like.


Poori/Puri - How to make puffed pooris

Poori(puri) is very popular indian breakfast recipe. It is deep fried and puffed bread made from the whole wheat. Whenever i made pooris my two little kids feels like a treat for them even me also feel the same in my childhood when my mom prepared for us.


Ingredients

whole wheat - 2 cups
Salt - to taste
suji - 1 tbsp
Water - 1 cup
oil - for deep frying

Instructions

  1. Take whole wheat atta, sujji and salt in a bowl and mix well with your fingertips, so everything is incorporated well. 
  2. Now add the water and start kneading the dough. Dough should be smooth and tight not soft like rotis. 
  3. Make the dough into small sized smooth balls and covered with kitchen towel, so they don't dry out. 
  4. Dust the balls in flour and make small sized poori. Use less flour for dusting.The thickness should be medium, not too thin like chapati.If u make it thin,puris won’t puff up. 
  5. Roll few pooris and keep them in a plate, also keep them covered with kitchen napkin. poori should be rolled at even thickness. If it is thin from one side and at some part it is thick then it will not puff up while frying. 
  6. Heat the oil in a pan on medium heat. Once hot slice one poori into hot oil. By very gentle pressing using back of slotted spatula, fry them. It will help poori to puff up. 
  7. As it is puffed up and bottom side is light brown meaning no more bubbles in the oil. Then flip it. 
  8. Fry the other side until it is light golden brown in color. Do not fry for long time otherwise it will get crispy and hard with dark brown in color. 
  9. Remove it from the oil using slotted spoon and place on paper towel lined plate. fry all the pooris same way and serve hot.

Monday, 23 May 2016

Babri Beoul Tresh | Basil Seeds (Sabja) Kheer | Kashmiri Kan Sharbat

Basil seeds improve digestion, boosts immune system, combats stress, aids in curing respiratory disorders and is great for skin disorders. But did you know that this seed, when consumed, has a cooling effect on the body?

The cooling and heating of our bodies according to the changing environment helps us detox and cleanse our body organs so we are lighter, more resilient and stronger than last season.

And It is mostly a kashmiri dish, Kan Sherbat is a very popular beverage of the Kashmir. It is made during the Holy month of Ramadan.


Ingredients

Milk - 1 1/2 cup
Sugar - 3 tbsp
Cardamoms - 2
Saffron - 6 to 7 Strands
Babri Beoul Seeds - 25 gms
Water - 1 glass
Grated Dry Coconut - 2 tbsp

Instructions
  1. Soak the Babri Beoul Seeds in a bowl with one glass of water for 1 or 2 hours.
  2. Observe the change in the texture of the seeds the moment the water is added to the seeds. It is a really amazing one.
  3. Add more water if required.
  4. Observe the swelled part of the seeds and add water if necessary as the seeds need to be properly soaked to get the taste.
  5. Boil the milk, add sugar, saffron and mix well.
  6. Add crushed cardamoms, grated coconut switch off the flame and allow it to cool.
  7. when done add well soaked Sabja seeds to the milk and refrigerate for 2,3 hours.
  8. And serve Cool.

Monday, 18 April 2016

Panakam - The Energy drink in summer | Rama Navami recipes

If we look into the science behind our traditional recipes which passed on by our ancesstors, it shows there wiseness in designing recipes. Panakam’ is one such drink which is made especially during Sri Ramanavami and Narasimha Jayanti festivals.

It is a known fact that seasonal variations introduce a multiple changes to our health conditions. Heat during the summer causes variations in Vaatham (lethargy) and Kafam (phlegm), while Jataraagni (the fire which induces hunger) subsides leading to loss of appetite.

It is made with a mixture of jaggery, sonti (dry ginger), black pepper and cardamom, Panakam acts as a coolant in the hot sweltering summer.The ingredients in Panakam counteract such elements and provide an instantaneous rejuvenating feel to the one who consumes it. In addition to that, when consumed with ‘vadapappu’ it aids the digestion offering a one stop solution to all the ills during summer.


Ingredients
1 cup Jaggery
1/2 tsp Dry ginger
2 Elachi/cardomom
6 cups Water
pinch of Black pepper

Instructions

mix all the ingredients well and then chill for a few hours.

Sunday, 17 April 2016

Sweet Idiyappam


Idiyappam is a healthy breakfast item as it is steam cooked and easily digested dish which can be prepared in very less time. I have already made a detailed post on how to make idiyappam (plain ones) and lemon idiyappam. If you have not checked, do refer it. Today I'm sharing how to make Sweet Idiyappam with coconut and sugar.


Ingredients

2 cups prepared idiyappam
1 cup grated coconut
1/2 cup sugar
pinch of cardamom powder/elachi

Instructions

  1. Take Idiyappam in a plate, and loosen the strings 
  2. Add grated coconut, elachi and sugar and mix gently.
  3. Serve hot
Note
  • If the idiyappam are not cooked properly you wont get the nice flavor. 
  • All the mesurements can be customized according to the need.
  • while serving add the sugar, because it tend to oozes the water.


Thursday, 14 April 2016

Rava Idli

Rava Idli is very simple and healthy recipe. It's not only healthy but very easy to prepare. Now a days there are readymade instant idly packs are available in the market, it requires only adding some water and steaming. However, nothing can beat the taste of authentic healthy homemade idli, even it also doesn't take much time, as it needs no grinding no fermentation like normal idli's. Today I'm sharing how to prepare soft and spongy Rava Idlis by following this simple Rava Idli Recipe.


Ingredients

1 cup Rava (sooji/semolina)
1/3 cup Curd
Salt as required
Coriander leaves handful
6-7 Cashew nuts(broken)
1/2 cup grated Carrot
1 tsp eno fruit salt
1 tbsp oil
1 tbsp ghee
1/2 tsp Mustard seeds
1/2 tsp cumin seeds
pinch of Asafoetida/hing
1 tsp Urad dal
2 Green chilli chopped
1' Ginger finely chopped
2 springs Curry leaves
1 cup + 2 tbsps water


Instructions

  1. Take a frying vessel, heat oil and ghee, add mustard seeds when they splutter, add cumin seeds, urad dal, curry leaves, red chilli, cashew nuts and toss them until they turn light brown.
  2. Add rava and mix well.
  3. Roast it on medium flame until it turns light brown and nice aroma comes from rava. Stir continuosly otherwise rava will get burn. and take it in a separate bowl and keep it to cool.
  4. In another bowl, add curd, chopped green chillies, ginger, salt, roasted rava and water mix well with out forming lumps.
  5. Add grated carrot, chopped coriander and mix well. keep this batter aside for 15 min.
  6. Pour 2 glasses water in a steamer and heat over medium flame. Grease the idli plates.
  7. Now add eno fruit salt into the batter and mix well for 1 min. After this you observe bubbles in the batter.
  8. pour batter in greased molds and steam it on medium flame for 10-15 min don't heat on very high flame or low flame.
  9. After 15 min, remove the molds from steamer, and after 2 min, remove preaped idlis from it ans serve hot with chutney.

Wednesday, 13 April 2016

Gongura Channa Curry

Gongura Channaga pappu is one of the delicious curry recipe from Andhra cuisine
In Andhra Gongura is also known as Andhra Maata(Mother of Andhra Food).Today I would like to share Channaga pappu gongura.2 Cups Chanaga pappu/Chana Dhal/slit chick peas.


Ingredients

2 bunches of sorrel/gongura leaves
1 medium onion
2 green chillies
1/4 tsp turmeric powder
1/2 tsp red chilli powder
salt to taste
small lemon size tamarind
2 tbsp oil
curry leaves
1/2 tspn mustard seeds
pinch of Hing
pinch of mustard powder
2 clove garlic crushed
Fresh coriander to garnish

Instructions

  1. First cook the channa dal in a vessel, until they become soft (when we pressed with our fingures it should get crushed) don't cook too much.
  2. when it done, add finely chopped gongura/sorrel leaves, sliced onion, sliced green chilli, salt, turmeric, red chilli powder, tamarind on top of dal, Cook until the leaves get cooked well.
  3. Switch off the flame and keep it aside and mash coarsely with the wooden masher.
  4. For temper take a saute pan and heat it up add some oil to the pan, when the oil is warm enough add rest of the ingredients like mustard seeds, hing ,  red chilli, curry leaves, garlic and roast them until the aroma comes out finally add the hot sizzling tempering to the curry, mix well and serve it.
  5. This curry goes well with hot steaming rice or pulka, paratha.


Mullangi Pappu | White Radish Dal


Dals are common in every Indian household and they are packed with proteins and very light. mullangi is usually called as mooli, muraai in hindi and radish in english. The dal made with this veggie tastes delicious and goes well with rice and other vegetable curries. My way of making dal at home is super simple with very few ingredients.


Ingredients

1 1/2 cup Toor dal/Kandhi pappu
1 cup Mullangi/ white radish pieces
lemon size tamarind
1 medium onion
2 springs curry leaves
2 green chilles
1/2 tsp turmeric
salt to taste
1 tsp mustard seeds
1/2 tsp jeera
1/2 tsp urad dal
2,3 cloves of garlic
pinch of hing
oil 3 tbsp

Instructions
  1. Wash the dals and put them in the pressure cooker
  2. Add chopped mullangi/radish, tamarind, chopped onion, chopped green chillies, turmeric, salt, and add enough water( 2 cups ).
  3. Pressure cook them until 3 whistles, now off the flame.
  4. Wait until the pressure goes.
  5. Now remove the whistle and lid, mash the dal with wooden masher.
  6. Now take another small pan, heat the oil, add mustard seeds when it starts spluttering, add jeera, urad dal, crushed garlic, curry leaves and hing.
  7. Now add these tempering to dal
  8. Adjust the taste of dal, by adding salt, red chilli powder as u like. (add water if any required)
  9. Now keep the cooker on low flame, let it cook for 10 min more.
  10. Switch off the flame and serve hot with rice /rotis.

Potato Fry

Ingredients

250gm Potatoes 
1 tbsp Oil 
Salt as per taste
1 tsp Red Chilli Powder 

1 tsp ginger garlic paste
1/4 tsp garam masala
1/2 tsp dhaniya powder
1/2 tsp mustard seeds
1/2 tsp jeera
1 medium onion


Instructions

  1. Chop the potatoes into small pieces and soak them in water for a few minutes.
  2. Heat oil in a pan over medium flame, add mustard seeds when they splutter add jeera, add ginger garlic paste and fry until nice aroma comes.
  3. Add the chopped onions and fry them till they turns golden brown
  4. Drain the water and add the potatoes to the pan.
  5. Fry till the potatoes become golden and all water has evaporated.
  6. Sprinkle salt and chilli powder, dhaniya powder, garam masala powder and fry on low flame for a 2-3 min.
  7. Transfer to a serving plate and serve hot with rice as side dish with rasam or sambar.


Tuesday, 12 April 2016

Pachi Mamidikaya Pulihora | Raw Mango Rice


Ingredients

2 cups cooked white rice
1 cup grated raw green mango
2 tbsps peanuts
1 tbsps cashewnuts (broken)
salt to taste
1 1/2 tbsp oil
1 tsp mustard seeds
1 tbsp channa dal
1 tbsp split black gram dal
1 dry red chillis
2-3 slit green chillis
1 tsp grated ginger (optional)
1/4 tsp asafoetida
1/4 tsp turmeric pwd
1 spring curry leaves

Instructions


  1. Heat oil in a cooking vessel and add the mustard seeds. when they splutter, add the channa dal and gram dal and let them turn red on medium heat. 
  2. Add the peanuts and fry them when they slightly fried, add the red chillis, green chillis, grated ginger, curry leaves, ginger, turmeric pwd and asafoetida. Toss them for a few seconds.
  3. Add Cashew nuts let them fry for 10sec, add the grated mango and stir fry it for a few mts (approx 3-4 mts).now turn off heat and keep aside.
  4. Spread the cooked white rice on a wide plate, sprinkle salt and add the tempering .
  5. Now use your hand to combine well till the tempering is well combined with the rice. Adjust salt.
  6.  Serve hot with perugu or pachadi of your choice.

Monday, 11 April 2016

Vankai Bangaladumpa kura | Brinjal Potato Curry

Vankai Bangaladumpa kura is very simple Andhra delicious curry. The combination of these two vegetables melt very one. This dish is also served in very special ocassions( vindu bojjanam) any functions in andhra. It can be served with rice/rotis.


Ingredients

2,3 Potatoes
1 cup peas
2,3 Tomatoes
1/2 tsp mustard seeds
1/2 tsp jeera seeds
1/2 tsp urad dal
1/2 tsp channa dal
2 springs curry leaves
2,3 green chilles
1 1/2 tsp coriander powder
1 tsp red chilli powder
1 tsp ginger garlic paste
salt to taste
1/2 tsp turmeric
2 tbsp oil


Instructions

  1. wash the brinjal and cut them into pieces, and soak them in salt water.
  2. wash the potatoes peel the skin and cut into cubes.
  3. Heat the oil in the cooking vessel, add mustard seeds when starts spluttering, add jeera, urad dal, channa dal, curry leaves, green chilles, ginger garlic paste, fry them untill nice aroma comes.
  4. Add brinjal pieces, potatoes and sprinkle turmeric,salt and let them cook for 7 min with covered lid.
  5. Remove the lid, add 1 cup boiled peas, add chopped tomatoes add coriander powder, and cook for another 10 min. stir ocassionally
  6. Add red chilli powder and adjust the taste as u wish. and cook for 2,3 minutes.
  7. Switch off the flame and serve hot with rice or rotis.


Carrot Soya Vepudu | Carrot Soya Fry

Forget about vitamin A pills. With this orange crunchy powerfood, you get vitamin A and a host of other powerful health benefits including beautiful skin, cancer prevention and anti-aging. Soy is a complete protein, and soyfoods are rich in vitamins and mineralsincluding folate, potassium.

I often use these carrots in my cooking, Carrot Soya Vepud is a simple and healthy dry south indian curry. Carrot fry is very basic. and you can play around with whatever ingredients you have on hand. Here I used Soya granules which is very full of good proteins. This fry can go well with Rice and can be served as a side dish with rasam, sambar, and any dal.


Ingredients

250gm Carrots 
2 tbsp Soya granules
2,3 Green chilies
1 medium Onion
1 spring Curry leaves
1 1/2 tsps Coriander powder
1/2 tsp Red chili powder
1/2 tsp mustard seeds
1/2 tsp jeera
Salt to taste
Oil - 1 tbsp

Instructions

Wash and peel the carrot and chop them.
Boil the carrot pieces with little water for 5 mins with closed lid.
Heat oil in a cooking vessel. Once hot, add mustard seeds, jeera , curry leaves, green chilies, saute for 5 to 6 seconds.
Add boiled carrots and soya granules and mix well.
Cook without lid on medium flame for 4 to 5 mts, Stir them ociassionaly to avoid burnt down. Reduce the flame, add salt, corriander powder, red chilli powder and cook untill the carrots are get nicely fried, approx 15-20 mts.
Turn off flame and remove into a serving bowl. Serve with rice or rotis.

Saturday, 9 April 2016

Vegetable Pot Biriyani

Biriyani is my favorite recipe. I think most of you would have heard about or tasted pot biryani, even i also heard pot biriyani so many times but tasted it recently, but I didn't find any difference between normal biryani and the pot biryani that i ate. I finally recognised that in restuarant (not all restuarants) they didn't cook in pot directly , they cook normally and transfer it to pot while serving. Yesterday I cooked white rice in the pot, It came really very flavourful. So today I tried vegetable biryani in the pot, which came really very tasty. My family like it soo much. 


Ingredients

2 glasses(250ml) rice  ( I used normal)/ basmati
2 potatos
2 carrots
1 cup green peas
1 /2 cup chopped beans
1 big onion
2 tbsp ginger garlic paste
1 cup chopped mint leaves
3 green chilles
2 cloves
2 cardomom
1 black cardomom 
2 star anise flowers
1 tsp shahi jeera
2" cinnamon/dalchini
2 kapok buds/ marati mogga
1 javitri
1/2 piece jajikai
2 tsps biriyani spice powder
6-7 tbsp oil
1/4 lt curd
2 tsp red chilli powder
2 tsp dhaniya powder
1/2 tsp turmeric
salt to taste
Saffron(optional)

Instructions

  1. First wash the rice and soak for 30 min.
  2. Cut the vegetables and keep in a bowl.
  3. Take another vessel and boil the water to cook rice, ( 5 glasses of water), add shahi jeera, cloves, cardamom, star anise, cinnamon, kapok buds, javitri, jaggikai, 1/4 cup mint leaves and when the water come to boil, adjust the salt and add rice.
  4. While the rice was cooking, take the pot and coat inside the pot with oil completely.
  5. Heat some oil in pot fry cashew nuts and take them out and place in a plate. 
  6. Now fry the onion slices, and separte half of them into separate plate.
  7. Now add ginger garlic paste to the pot and fry along with remaining onions. let it fry until nice aroma comes.
  8. Now add all the vegetables, mint leaves, red chilli powder, turmeric, salt, dhaniya powder, curd and mix well
  9. Cook the rice until it gets half boiled( when we press the rice with fingures it should break)
  10. Take the half cooked rice and spread on top into the pot.
  11. Sprinkle some mint leaves, saffron water(optional), fried onions, cashew nuts.
  12. Cover with a lid, and put some weight on it. so that, the steam can't go out and rice cooks well.
  13. Cook for 20- 30 min in very low flame. 
  14. Off the flame and transfer entire into a big vessel and mix well and serve hot.


Friday, 8 April 2016

Ugadi Pachadi | Shadruchulu

The term Ugadi is derived from the Sanskrit word 'Yugadi' where 'Yug' means age and 'Adi' means beginning. Ugadi is the beginning of New year for the people of Andhra Pradesh, Karnataka, Maharashtra and the Konkan areas. It is the New Year according to the Hindu calendar. The first month of the year is called Chaitra and Ugadi is the first day of Chaitra. The festival is called Gudi Padwa in Maharashtra.

According to the Hindu mythology, Lord Brahma started the process of creation on this day. Hence Ugadi is celebrated with great enthusiasm all over South India. The Ugadi day marks the advent of the spring season which signifies the beginning of new life as the trees start bearing flowers and fruits.


The festival usually falls in March or April. This year, the festival falls on April 8 which is Friday. The pratipada tithi begins on April 7 at 4:53 PM and ends on April 8 at 1:05 PM.


A new year is a new beginning for a lot of things. People start their new business or any new investment or buy new property on this day because it is considered auspicious.


Likewise another most important ritual of Ugadi is preparing a special kind of chutney known as the Ugadi Pachadi or Shadruchulu. It is a must have item on the Ugadi menu. It is a tasty dish made with a lot of healthy ingredients. The Pachadi has six different tastes assimilated in it- sweet, salty, bitter, tangy, spicy and sour. All of these tastes represents the different facts of life.


So, apart from being a tasty dish, the Ugadi Pachadi is significant in many other ways. Do you want to know about the significance of Ugadi Pachadi? Then read on.

Bitterness The bitter taste of the Pachadi comes from the neem flowers. The bitter taste are the unhappy moments of life. 


Sweetness The sweet taste comes from the jaggery. The sweet taste are the happy moments of life.

Tangy The tangy taste of the Pachadi is from the unripe mango. Ugadi marks the beginning of the mango season. Hence mango represents the surprise element of our life and that a person should always be prepared for it.

Spicy The spicy taste comes from the red chilli powder. It represents the angry moments in life.

Salty The salt represents the taste of life. The salty moments are necessary to make our lives interesting.

Sour Tamarind adds the sour taste to the Pachadi. It represents the sour moments of life which along with other flavours make our lives worth living.

Ingredients


1 tbsp Neem flowers
1 tbsp Jaggery
1/4 cup unripe mango pieces
1 tsp chilly powder
1 tsp salt
small lemon size tamarind
1 cup water

Instructions

  1. Soak the tamarind in little water and make it into paste.
  2. Take 1 cup water in a bowl, add neem flowers, jaggery, mango pieces, chilly powder, salt and the tamarind paste.
  3. Mix it well, and keep it for naivedyam to god. and later serve.


Thursday, 7 April 2016

Kantola fry | Aakakarkaya vepudu

Kantola is also known as Aakakarkaya in Telugu, Teasel guard, kakrol, kankoda, phagil, phagla and kartole locally in some other parts of india. It is a spiny green gourd which have tiny spines appears during the monsoon in india. They tastes slightly bitter like karela/kakarkaya. Its a very healthy vegetable as it possess very good nutritive and medicinal properties. It is rich in fibre and vitamins and is cooling to the body.


Ingredients

500gm kantola
1 medium onion
1/2 tsp turmeric
1 tsp red chilli powder
1/4 tsp garam masala powder
1 tsp corriander powder
1 sp grated jaggery
1 tsp raw mango powder
1 sp ginger garlic paste
2 tbsps oil
1/2 tsp mustard seeds
1/2 tsp jeera
salt to taste


Instructions

  1. Wash the kantola well, peel the skin lightly, and chop them
  2. Take a pan, heat the oil, add mustard seeds when splutter add jeera, onions when they become soft add ginger garlic paste let it fry until nice aroma comes.
  3. Add chopped kantola, turmeric mix well and cover with lid and cook for 5-7 min
  4. Remove the lid add all the spices one by one, and adjust the taste and mix well.
  5. Now cook with out covering with lid by stirring occasionally.
  6. Finally Add jaggery, mix well and cook for 2,3 min more
  7. Switch off the flame and serve with rice, also works well as a side dish with sambar, rasam.

Tuesday, 5 April 2016

Lemon Idiyappam | Lemon Sevai

Idiyappam is a healthy breakfast item as it is steam cooked and easily digested dish which can be prepared in very less time. Even kids love to eat this dish as it looks similar to noodles. I have already made a detailed post on how to make idiyappam (plain ones). If you have not checked, do refer it. Today I'm sharing how to make Lemon Idiyappam which tastes tangy just like our lemon rice with plain idiyappam, the process is also same as lemon rice.


Ingredients

2 cups prepared idiyappam (loosen the rice strings)
1 1/4 tsp Lemon juice
Salt to taste
1/2 tsp Turmeric powder
few Coriander leaves(optional)
1 spring Curry leaves
2-3 Green chillies/ Red chilles
1/2 tsp Channa dal
1/2 tsp Urad dhal
1 tsp Mustard seeds
Oil – 1 1/4 tbsp
pinch of hing
2 tbsp cashew nuts or peanuts (optional)


Instructions


  1. In a bowl, add lemon juice and salt, turmeric and Keep it aside.
  2. Take a kadai, heat oil,add mustard seeds, when they splutter, add hing, chilles, bengal gram, urad dal, cashew nuts,curry leaves.
  3. Saute for a few seconds till dal turns golden brown.
  4. Add the lemon juice mixture to the temporing 
  5. Switch of the flame and add plain idiyappam to the above and mix well. Adjust salt and lemon juice according to your taste.
  6. Take care while mixing do not mix too much as the rice strings will break.
  7. garnish with corriander and serve hot.


Palakura Roti Pachadi | Spinach chutney


Ingredients

2 bunches Palak
5,6 Red chilles
2 tbsp Urad dal
1 tsp jeera
1 tsp mustard seeds
1 tsp Channa dal
1 tsp Corriander seeds
Pinch of Hing
2 springs Curry leaves
small lemon size Tamarind
1 medium Onion
3,4 Garlic cloves
Salt to taste

Instructions


  1. Take a pan, Heat the oil on low flame, add red chillies and fry them.
  2. When red chilles got fried, take them in separate plate, and add mustard seeds, jeera, Channa dal, Corriander seeds, Urad dal, Hing, curry leaves and fry all them until nice aroma comes from it.
  3. Now take all of it into the separate plate in which we place red chilles.
  4. Now in the same pan with out adding any extra oil, add chopped palak, add tamarind and let it fry for 5 min
  5. When palak got fried, switch off the flame and let it cool for some time.
  6. Now In the rolu(din chik motor) first grind all the tempering dals,red chilles amd make them into coarse powder.
  7. now add raw chopped onion, garlic and make into coarse paste.
  8. finally add cooked palak,tamarind, salt into rolu and make into coarse paste.
  9. Take all the pachadi into separate bowl and serve with Rice, rotis, Idlis, Dosas etc.


Want to do in Mixer
  1.  After Step 5, add the temapring dal and red chilles into mixer and grind them into paste.
  2. add garlic and onions and make mixer for 2 sec
  3. Now add cooked palak, salt and grind only for 2, 3 sec otherwise it will become into paste.
Note : If U do tempering again it will taste more but I wont do.

Monday, 4 April 2016

Pessarattu | Moong dal Dosa

Pesarattu is a famous Andhra breakfast item.This dosa is made with green gram and rice ,which best suits with upma..The hit duo is called Upma Pesarattu..These dosas are so crisp and gives a total different taste.
Andhra Pesarattu is best serve with ginger pickle, peanut chutney. I totally love these crsipy green gram dosas any time for breakfast or dinner.
Usually it is prepared with only green gram(in telugu it is called ‘pesalu’) but we add a fistful of rice to give the dosas a crispy nature.


Pesarattu will be garnished with lots of chopped onions,ginger and chilli flakes, fresh coriander which makes it even more tastier.. Here I added Onion and karampodi.


Ingredients


2 cups Green gram(pessalu) - 2 cups
1/2 cupRice
1 finger size Ginger
3,4 green chilli
salt to taste

Instructions

  1. wash and soak the green gram,rice in one bowl for overnight.
  2. put the soaked green gram,rice in the blender, add ginger pices, and green chilli pieces and grind into fine soft batter by adding some soaked water.
  3. Heat a non-stick tava and grease lightly with ghee. When hot, sprinkle a little water, pour 2 to 3 tablespoons of batter and spread round and cook on one side.
  4. Pour a little ghee along the edges while cooking. When crispy, fold and serve hot with butter, chutney.
  5. Repeat for the remaining batter.

Beerakai Pappu | Ridge guard Dal

Dals are common in every Indian household and they are packed with proteins and very light. Beerakaya is usually called as turai in hindi and ridge gourd in english. The dal made with this veggie tastes delicious and goes well with rice and other vegetable curries. My way of making dal at home is super simple with very few ingredients.


Ingredients

1/2 cup Toor dal/Kandhi pappu
1/2 cup moong dal/ pessara pappu
1 cup Beerakai/ ridge guard pieces
lemon size tamarind
1 medium onion
2 springs curry leaves
2 green chilles
1/2 tsp turmeric
salt to taste
1 tsp mustard seeds
1/2 tsp jeera
1/2 tsp urad dal
2,3 cloves of garlic
pinch of hing
oil 3 tbsp

Instructions
  1. Wash the both dals and put them in the pressure cooker
  2.  Add chopped beerakai/ ridge guard, tamarind, chopped onion, chopped green chillies, turmeric, salt, and add enough water( 2 cups ).
  3. Pressure cook them until 3 whistles, now off the flame.
  4. Wait until the pressure goes.
  5. Now remove the whistle and lid, mash the dal with wooden masher.
  6. Now take another small pan, heat the oil, add mustard seeds when it starts spluttering, add jeera, urad dal, crushed garlic, curry leaves and hing.
  7. Now add these tempering to dal
  8. Adjust the taste of dal, by adding salt, red chilli powder as u like. (add water if any required)
  9. Now keep the cooker on low flame, let it cook for 10 min more.
  10. Switch off the flame and serve hot with rice /rotis.

Sunday, 3 April 2016

Boiled Potato fry

Boiled Potato fry is a traditional dish of south india, it can be served with plain rice and goes well as side dish with Rasam, sambar, curd rice. There are many variations in potato fry recipe. The one I'm sharing today uses very little oil and with basic ingredients. 

This dish can be served with dosa which we call masala dosa, its really very tasty, and can be used as a filling for samosas.


Ingredients


500gm Potatoes
3-4 green chilles
1/2 tsp mustard seeds
1/2 tsp jeera
1/2 channa dal
1/2 tsp urad dal
pinch of hing
1/2 tsp turmeric
2 springs curry leaves
1 medium onion
corriander leaves
1 tbsp oil
salt to taste
half lemon


Instructions

  1. Wash and boil the potatoes. Remove the skin and corsely mash the potates. 
  2. Heat oil in a pan, add mustard seeds once get splutter, add cumin and dals. 
  3. When the dals turn slightly golden, add hing and curry leaves. 
  4. Add chopped green chillies, onions saute them till they get soft. 
  5. Add mashed potatoes, sprinkle turmeric, salt, mix well and cook for 10 minutes with covered lid by stirring occasionally. 
  6. Now add corriander leaves and squeeze the lemon and mix well.
  7. Off the heat and transfer boiled potato fry to a serving bowl. Serve wit rice, rasam, sambar or with Dosas.